
Home / Gift guides / Organise photos first
Photo Book TipsHow to Organise Photos and Back Them Up Before Making a Photo Book
To organise photos for a photo book, copy everything into one safe place, sort it by year and event, delete duplicates and blurry shots, star your favourites, and keep three backups. A single weekend is enough to turn a messy phone gallery into a folder you can build a book from.
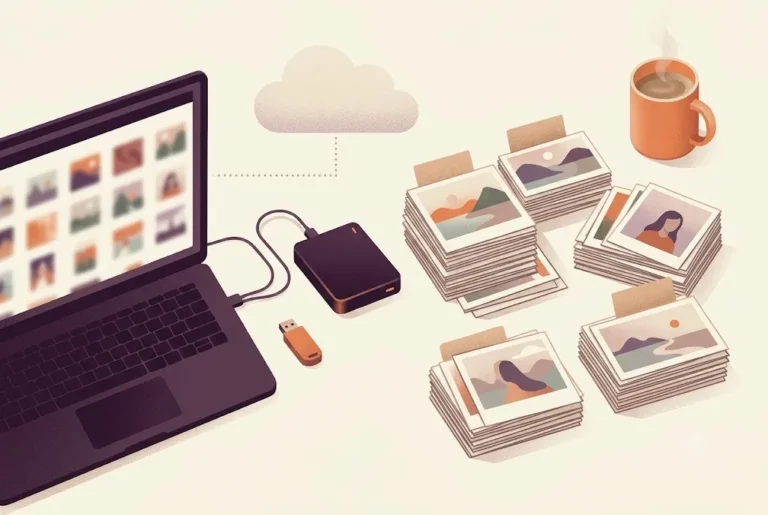
Most photo books never get made for one boring reason: the photos are a mess. Ten thousand pictures sit across two phones, an old laptop, a Google account and a dozen WhatsApp groups, and nobody knows where to begin. The idea of sorting it all feels heavier than the idea of the book itself.
The good news is that you do not need special software or a perfect system. You need a plan to organise photos in a sensible order, a way to protect them, and one weekend. This guide walks through the whole thing: where to collect, how to name folders, how to cull, how to pick favourites, how to back up, and how to hand the final set over for design.
If you only want the short version, jump to the one-weekend plan. If you are still deciding what the book itself should hold, read how to choose photos for a memory book alongside this page.
Why you should organise photos before designing anything
A photo book is a story with a beginning, middle and end. You cannot tell that story from a pile. When you organise photos first, three things get easier at once.
- Choosing is faster. Forty good pictures in a folder called "Goa trip 2025" beat four thousand unsorted ones.
- Nothing gets lost. The act of gathering everything in one place is also the moment you notice what exists only on a dying phone.
- The design goes smoothly. A designer, or you, can lay out pages in order when the files already follow a timeline.
There is also an emotional reason. Going through old pictures, even briefly, reminds you why the book matters. Many families find the weekend spent to organise photos is the best part. Put on some music, make chai, and let it be a small event rather than a chore.
Before you start, decide the purpose. An anniversary photo book needs different pictures from a baby's first year, so write one line on a sticky note: who is the book for, and what is the story? Everything below flows from that line.
Step one: collect everything in a single place
You cannot organise photos you have not found. Start by listing every place pictures live:
- Your phone and your partner's phone (camera roll, screenshots, downloaded images)
- Old phones in drawers, memory cards and pen drives
- Google Photos, iCloud, Instagram saves and email attachments
- WhatsApp groups where family shared event pictures
- Laptops and desktops, including the "Downloads" folder
Create one master folder on your computer, for example Photo Book Master, and copy (do not move) files into it. Copying keeps the originals safe until you finish. If the pictures are on paper, scan them later using the steps in how to digitise old family photos for a photo book.
A word on WhatsApp. By default WhatsApp compresses photos, so a picture saved from a chat is often a smaller copy of the original. If the same picture exists on the sender's phone, ask them to send it again as a document, which keeps the original file. This matters for print, because a small file looks soft on a page. Our guide to making a photo book from phone photos and WhatsApp covers this in detail.
Build a folder structure to organise photos without confusion
The best way to organise photos is the one you will still understand in five years. Keep it predictable. A simple structure that works for most Indian families:
| Level | Example | Why it helps |
|---|---|---|
| Year | 2025 | Sorts in order without effort |
| Date plus event | 2025-11-12 Diwali at Nani's house | Folders line up as a timeline |
| Special folders | _Favourites, _Cover ideas, _To scan | The underscore keeps them at the top |
Always write dates as year, month, day. A folder called "12-11-2025" sorts badly on a computer, while "2025-11-12" always lands in the right place. Use names with place or people, such as "2025-05-20 Rishikesh trip" or "2024-02-14 Aarav first birthday".
You do not need to rename every picture. Rename the folder and let the camera keep its own numbering. Only rename the files you star, and put a short note at the front, for example "Cover_Aarav on swing.jpg". It is a small habit that helps whoever lays out the pages.
If you are making a long book such as a family photo book spanning decades, group by decade first, then year. Do not create more than three levels, because deep folders hide pictures.
Cull duplicates, blurs and near-misses
Culling is where most people get stuck, so give yourself rules. When you organise photos, you are not deciding what to delete forever. You are deciding what does not belong in this book. Work through each folder in this order:
- Remove exact duplicates. Burst shots, forwarded copies and screenshots of the same picture.
- Remove technical failures. Out of focus, eyes closed, a thumb over the lens, very dark pictures.
- Pick one from each series. If you took fifteen pictures of the same cake, keep the two best.
- Skip memes, forwards and screenshots unless they are part of the story.
Zoom in to 100 percent before you delete a picture you are unsure about. Many shots look sharp on a phone and turn out soft on a big screen. A softness you can see on a laptop will be visible in print.
Keep a "_Maybe" folder for anything you cannot decide on. Come back to it once, after a break. If you still hesitate, it is a no. This one rule can shrink a 600-picture event to a manageable 60 in an hour or so.
Culling hurts less when you remember why you organise photos at all. A book with 60 strong pictures moves people. A book with 300 average ones tires them. For numbers, see how many photos to put in a photo book.
Mark favourites and use face grouping to organise photos by person
Once the folders are clean, star your favourites. On Google Photos and iPhone Photos, tap the heart. On a computer, add a star rating or move picks into a _Favourites subfolder inside each event.
Use a simple three-tier method:
- Hero shots: the pictures that deserve a full page. Pick roughly one per event.
- Supporting shots: good pictures that fill out a page or spread.
- Detail shots: hands, food, a doorway, a handwritten card. These add texture.
Face grouping is a big help when you organise photos of a particular person. Google Photos and Apple Photos can group faces automatically, so you can search for "Dadi" and see every picture of her across ten years. Check the results by eye, because the software can confuse siblings and relatives who look alike. If you would rather not have your family's faces analysed by a cloud service, keep your master folder on your own drive and skip the cloud grouping. That is a personal choice, and both ways work.
A tip for gift books: ask yourself which picture the recipient would smile at first. Use it for the cover. For a photo book for parents, an old black and white portrait next to a recent family picture often makes a strong opening spread.
Sorted your folder and ready for the design? Share your photos on WhatsApp and the studio designs the pages. See personalised photo books.
Back up before you edit: the 3-2-1 rule
Before you sort a single picture for good, protect what you have. The simplest backup advice is the 3-2-1 rule: keep three copies of your files, on two different types of storage, with one copy somewhere else. The idea is credited to photographer Peter Krogh, and data protection guides repeat it because it survives a lost phone, a broken drive or a flat fire.
Here is how it looks for a family with one laptop:
| Copy | Where | Purpose |
|---|---|---|
| 1 | Your laptop's master folder | The working copy you edit |
| 2 | An external hard drive kept at home | Second type of storage, fast to restore |
| 3 | A cloud account or a drive kept at a relative's house | Protection against theft, fire and floods |
Do not treat a phone as a backup. Phones get stolen, dropped and reset. Do not treat one external drive as permanent either. Check your backups as carefully as you organise photos: open a few files from each copy every few months to confirm they still open.
Finally, back up your originals untouched. Edit or crop only copies. You never know when you will want the uncropped version for a different book.
Cloud vs external drive: what suits a family
Both have a place, and the best answer is usually one of each. Compare them honestly:
| Option | Strengths | Weak points |
|---|---|---|
| External hard drive or SSD | One-time purchase, no monthly fee, quick to copy large folders | Can fail, be lost or be damaged; needs you to remember to plug it in |
| Cloud storage | Automatic, off-site, reachable from any phone | Cost beyond free space; depends on your account staying secure |
On Google Photos, the free 15 GB is shared across Gmail, Drive and Photos, and the "Original quality" setting keeps your full-resolution files while "Storage saver" compresses them. Google explains the difference on its backup quality help page. For a photo book, upload in original quality, because compressed copies can look soft in print.
A practical pairing: keep your master folder on a laptop, a copy on an external drive, and a cloud backup of at least the favourites. Turn on two-step verification for the account that holds the cloud copy. If the account is locked, so are your memories.
Many families also keep one drive with grandparents or a sibling in another city. It costs nothing and gives you the off-site copy.
Use shared albums so the family helps you organise photos
You do not have to organise photos alone. A shared album turns the whole family into your photo scouts. In Google Photos or iCloud, create an album named after the book, such as "Dadi 80th birthday book", and invite relatives to add their pictures.
Give them three clear rules in the invite message:
- Add only pictures from this event or period.
- Add the original file, not a forwarded copy.
- Write the year or a name in the caption if you know it.
Set a deadline, for example "by Sunday night", otherwise pictures will trickle in for months. After the deadline, download the album into your master folder and treat it like any other folder: cull, star, back up.
Shared albums are also a gift for people who are far away. A cousin abroad can add a picture in thirty seconds, and the final long distance photo book then feels like it came from everyone. Credit contributors on a page at the back.
One caution: check privacy before you add a link. Anyone with a shared link may be able to view the album, so send it only to people you trust, and remove it once the book is done.
A one-weekend plan to organise photos
Here is a realistic plan for families with a few thousand pictures. Adjust the hours to your own pace.
| When | Task | Time |
|---|---|---|
| Friday evening | List sources, create the master folder, set up an external drive | 1 hour |
| Saturday morning | Copy everything in and start the first backup | 2 hours |
| Saturday afternoon | Create year and event folders, drop pictures into them | 2 hours |
| Saturday evening | Cull duplicates and blurs in the events you need | 1.5 hours |
| Sunday morning | Star favourites, choose cover ideas, gather shared album pictures | 2 hours |
| Sunday afternoon | Run the second and third backups, then check they open | 1 hour |
You will not sort the whole library perfectly in one weekend, and you do not need to. Aim to organise photos for this book first. The rest can wait for another weekend. A good target is a clean folder of 100 to 200 starred pictures from which the final selection is made.
If the book is a gift with a deadline such as Diwali on Sunday 8 November 2026, start at least two weekends earlier. Timelines are easier when you organise photos before the festival rush begins. For ideas, browse our Diwali gift ideas for family and friends.
Hand over the photos you organise for design
When your folder is ready, the last step is sharing it in a form that a designer can use. With Ragnar Studio's, you send the photos on WhatsApp, the studio designs the pages, you approve them, and then the book goes to professional printing. Support is available in English and Hindi.
To make that smooth, prepare a short brief:
- Who and why: the recipient, the occasion, the mood you want.
- Order: chronological, or grouped by theme such as "festivals", "travel", "everyday".
- Captions: names and dates, plus any short lines you want on pages. Ideas are in photo book caption ideas.
- Must-haves: the cover picture and three or four pictures that must appear.
Send the favourites as documents or in a shared link rather than as compressed chat images, so the files stay at full quality. If you want to see how a layout can flow, read photo book layout and design tips.
Photo books start from ₹799 / $19. Every book is A4. For anything else, such as paper or timelines, ask the studio on WhatsApp at +91 92865 18510. You can also browse all our personalised photo books to see the occasions we design for.
Common mistakes when you organise photos
These are the errors that waste the most time. Avoid them and you will save hours.
- Deleting before backing up. Always back up first, cull second.
- Relying on one place. A phone plus a cloud account is two copies on connected systems. Add an offline copy.
- Using compressed WhatsApp copies as masters. They lose detail that print needs.
- Over-organising. Spending a month tagging every picture helps no one. Organise photos only to the level your book needs.
- No dates. A picture without a date is hard to place. Add the year in the folder name, even if you must guess.
- Forgetting the cover. Choose three cover candidates early, so the design has a starting point.
- Ignoring permissions. Ask before using pictures of other people's children or private moments.
A final idea: once the book is done, keep your folder structure. Next year, you will organise photos by simply adding a new year folder, and the next book will take an afternoon instead of a weekend.
Frequently asked questions
What is the best way to organise photos for a photo book?
Collect everything in one master folder, then sort by year and event with names like 2025-11-12 Diwali. Delete duplicates and blurry shots, star favourites, and keep a backup. This way to organise photos works on any computer and needs no special software.
How many photos should I keep when I organise photos for a book?
Keep roughly 100 to 200 starred pictures as your pool, and use fewer in the final book. Exact numbers depend on page count, so read our guide on how many photos fit in a photo book. Ask the studio on WhatsApp about the pages for your book.
Should I back up photos before I organise photos?
Yes. Always copy the originals to a second place before you rename, move or delete anything. Then organise photos on the working copy and keep the untouched originals safe.
What is the 3-2-1 backup rule for photos?
Keep three copies of your photos, on two different types of storage, with one copy kept off-site. For example, a laptop, an external drive and a cloud account. The rule is a simple way to protect family pictures from loss.
Is Google Photos enough to back up my pictures?
It is a good start, but it should not be your only copy. A free Google account gives 15 GB shared with Gmail and Drive, and the quality setting matters, so choose Original quality for print. Pair it with an external drive.
How do I organise photos from WhatsApp groups?
Save the pictures from each event into a dated folder and ask the sender for originals of your favourites, sent as documents. This keeps full quality. See our WhatsApp photo book guide for the steps.
Can I organise photos on my phone only?
You can, using albums and favourites in Google Photos or Apple Photos, but a computer is easier for big batches. If you only have a phone, create one album per event, heart your best pictures and back up to the cloud before you start.
Can Ragnar Studio's help me organise photos for a photo book?
Yes. Send your photos on WhatsApp at +91 92865 18510, tell the studio the story, and it designs the pages for your approval before printing. Photo books start from ₹799 / $19. Ask on WhatsApp about anything else.
A little structure goes a long way: when you organise photos once, back them up properly and star your favourites, the book almost designs itself. Start with one master folder tonight, then message the studio on WhatsApp at +91 92865 18510 when you are ready. You can also explore personalised photo books for ideas.
Start your book
Tell us your story.
Build your enquiry here, then send it in WhatsApp. We’ll discuss the design, final price and delivery before you order.
- Choose a page count and occasion
- Add as much or as little story as you like
- Send photos in the same WhatsApp chat
- 1Book
- 2For
- 3Story
- 4Photos
- 5You
- 6Review
To create a book, contact us on WhatsApp or email info@ragnarstudio.com. The step-by-step form needs JavaScript.
Almost there
Your enquiry is ready to send.
Open WhatsApp, review the message and press Send. Share your selected photos in the same chat.
Keep reading.
More ideas and guides from Ragnar Studio's.
 Photo book guideHow to Choose Photos for a Memory Book: 12 Tips That WorkLearn which pictures deserve a page, how to balance faces and places, and how to pick a cover that feels right.Read the guide →
 Photo book guideHow Many Photos in a Photo Book? A Page-by-Page GuideWork out how many photos your book needs so pages feel full without feeling crowded or rushed.Read the guide →
 Photo book guidePhoto Book Layout Ideas: Design Tips for a Book People Actually FinishSee how spreads, white space and photo sizes work together so your finished book looks calm and professional.Read the guide →
Turn your photos into a book worth keeping.
Share your photographs and a few lines. The studio will design the pages, you approve them, and it is professionally printed. Books start at ₹799 / $19.